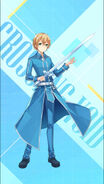
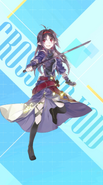
Dengeki Bunko: Crossing Void is a Japanese turn-based RPG mobile game co-developed in collaboration by 91Act & SEGA and published by Tencent. It was released on August 7th, 2016, available for download on Android and iOS stores. Like Dengeki Bunko: Fighting Climax, the game features over 50 iconic characters from more than 25 light novels published by Dengeki Bunko.
Crossing Void brings you brand-new storylines developed under direct supervision of the original authors!, Fabulous animated illustrations drawn by the world-class artists!, The voice cast from the original anime series!
The SEA version was officially launched on April 26th, 2016 by 37GAMES.
The Global version was officially launched on November 5th, 2019 by 91Act.
The Global version shut down on October 31, 2022.
Characters[]
Gameplay[]
Enhancing Characters[]
- Rank / Rarities: Each character can be one of four rarities: C, B, A or S. Characters of higher rarities get 1 more talent per rank of rarity (C 1, B 2, A 3, S 4) and increased base stats. An increase in rarity can be acheived through obtaining the character is the gacha or as a random chance during talent shuffle.
- Level Up: Characters can gain EXP to level up, to a maximum of Lv 70. As a character levels up, their stats will increase and they will gain access to star up, the usage of impression weapons (at lv. 45), the usage of elementium (at lv. 60) and the usage of various equipment.
- Star Up: Each character can increase their star from 1 to 6. As a character's star increases, they will be granted increased stats and access to passive skills. Specific star up materials, obtained in the story, are required to increase a character's star.
- Skill Up: Skills can be levelled up to a maximum of lv. 25. As a skill's level is increased, it will become more useful (e.g. more DMG, heal more, etc). Increasing a skill's level requires Coin and Star Up materials (from lv 11 onwards).
- Awakening: S-rank characters can be awakened (up to rank 5) using Soul Fragments. Character specific soul fragments can be obtained by rolling a second (or further) s-rank of that character in Gacha. Origin Soul Fragments can be rarely obtained through various events and the Exclusive Memory missions.
- Talents: Talenrs are customisable additional stats that every character has. The number of talents that a character has is based on their rarity. There are 10 different universal talents that increases stats such as: Physical DEF, Arcane DEF, HP, ATK, Crit Rate% and Crit DMG%. Each [main] character has their own unique talent (see character section).
- Talents can be upgraded by Talent Shuffle. By using 1 character fragment or 1 origin fragment, you can roll for a new talent which will either have either the same talent score or a higher talent score.
Psyche[]
List of Psyche[]
Elementium[]
The Elementium module has seven slots. They act much like Talents, providing small stat boosts for your character.
The seven module slots has two kinds of Elementium affixes. Six Regular affix slots located on the outer circle, and one Signature slot in the middle. The regular affix slots has four unique types: Reflection, Vacation, Trait, and Belief. And two Generic slots that can use all the given regular affix slots.
You can also unlock very powerful abilities, depending on what slots you have active. These abilities are called resonances. You can see these resonances on the Overview or Summary page.
Only a select number of characters can currently use elementium modules:
- Accelerator (Main)
- Alice (Main)
- Asuna Yuuki (Main)
- Kirino Kousaka [Swimsuit] (Main)
- Kirito [Dual Blades] (Main)
- Kuroko Shirai [Maid] (Main)
- Kuroyukihime (Main)
- Kuroyukihime [Butterfly] (Main)
- Mikoto Misaka (Main)
- Mikoto Misaka [Swimsuit] (Main)
- Miyuki Shiba (Main)
- Shana (Main)
- Misaki Shokuhou (Main)
- Taiga Aisaka (Main)
- Taiga Aisaka [Maid] (Main)
- Tatsuya Shiba (Main)
- Yuuki Konno (Main)
list correct as of July 16 2021.
(Source: Crossing Void Global Wiki - Expanded)
Impression Weapons[]
Impression Weapons are equippable items available to characters level 45 and above. They provide stats as well as a unique combat ability. Impression weapons for Main Characters have an active ability that charges every round, do not take an action to use, and can be used by any ally team, not just the wielder's team. Impression weapons for Support Characters have passive abilities that are always in effect.
Impression Weapons can be enhanced, increasing their stats and unlocking additional bonuses. They also have star levels, but unlike characters, their star levels only increase by obtaining additional copies of the same Impression Weapon (Spiritual Awakening). Star levels improve the Impression Weapon's skill and also increase the maximum rank of their stats by 2 (max 10 when fully awoken).
(Source: Crossing Void Global Wiki)
List of Impression Weapons[]
- Da Sheng Yi Yin (for mains): Consumes 25% of the current team's max HP (but retains at least 1HP) to heal all allies for [Consumed HP * 18.40%] each turn. Lasts 2 turn(s).
- Járngreipr (for mains): Resets the Climax Skill of current team and reduces the team's DMG dealt by 5.00% for 1 turn(s).
- Lamp of the Nightingale (for mains): All allies receive 13.50% more healing for 1 turn(s).
- Gada of Indra (for mains): Increases all allies' CRIT DMG by 12.50%. Increases their CRIT rate by 4.20% each turn. Lasts for 4 turn(s).
- Vermillion Bird (for mains): The enemies take DMG equal to 17.00% ATK each turn for 2 turns. Removable ATK debuff towards them will last one more turn for 2 turns.
- Idun's Golden Apple (for mains): Heal all allies' HP equal to the impression weapon's equipper's 8% Max HP each turn, lasting 3 turn(s). Increases all allies' 8% ATK, lasting 3 turn(s).
Equipment[]
Equipment are items given to characters to raise their stats. Each character has four distinct equipment slots (I, II, III, IV), and each piece of equipment can only be equipped in a specified slot.
Equipment drops quite frequently in Story quests, but the main place to farm it is Treasure Hunt. Treasure Hunt III and above have a low chance of dropping A- or S-rank equipment, but always drops Secret Notes, which can be exchanged at the Shop for various pieces of equipment. Uncharted Void also drops Secret Notes with a small chance for high rarity equipment.
Equipment levels can be Enhanced with Potions. Stats increase with each level, and Random Stats are unlocked at levels 1, 4, 8, 12, 16, and 20. As implied, Random Stats are completely random and may not match the Base Stats on the equipment. A piece of equipment can only have up to 2 of the same Random Stat. Random Stats can be Infused to increase their effectiveness; level 20 equipment can also have their Random Stats Converted, allowing you to choose exactly which stats you want.
A-rank and S-rank equipment come in sets. If a character has 2 or more of the same set equipped, that character gains set bonuses. The 2-piece set bonus affects the entire team (Main and Support character), while the 4-piece set bonus only affects the character that has the set equipped.
(Source: Crossing Void Global - Wiki)
List of Equipment[]
- C-Rank Equipment:
- Souvenir Knife (I)
- Straw Hat (II)
- Whale Sandals (III)
- Playing Cards (IV)
- Mercenary Claymore (I)
- Mini Rock Sculpture (II)
- Sakura Letter (III)
- Squirt Gun (IV)
- Wrench (I)
- Small Fishbowl (II)
- Snow Globe (III)
- Basketball (IV)
- Barbell (I)
- Pearl Bracelet (II)
- Yo-yo (III)
- Marble (IV)
- Paper Airplane (I)
- Origami Crane (II)
- Nurse Hat (III)
- Origami Boat (IV)
- 2 Peice Bonus: Final Damage +2%
- 4 Peice Bonus: Damage +9.36% while CP<6
- Brick (I)
- Worksite Sign (II)
- Tool Chest (III)
- Safety Hat (IV)
- 2 Peice Bonus: Final Damage +2%
- 4 Peice Bonus: Damage of Skill 1 (including 0SP Skills) +9.72% [Main Characters Only]
- Doll Bomb (I)
- Remote Bomb (II)
- Bomb Fuse (III)
- Projectile Bomb (IV)
- 2 Peice Bonus: Final Damage +2%
- 4 Peice Bonus: Damage of Skill 2 (including 0 SP skills) +9.72% [Main Characters only]
- Sakura (I)
- Lily of the Valley (II)
- Hydrangea (III)
- Maple Leaves (IV)
- 2 Peice Bonus: Final Damage reduced by +2%
- 4 Peice Bonus: Healing increased by +4.32%
- Lantern (I)
- Wind Chime (II)
- Koinobori (III)
- Teru Teru Bouzu (IV)
- 2 Peice Bonus: Final Damage reduced by +2%
- 4 Peice Bonus: When acting on an odd turn, damage taken reduced by 11.52% (1 turn)
- Plantago (I)
- Foxtail Grass (II)
- Dandelion (III)
- Four Leaf Clover (IV)
- 2 Peice Bonus: Final Damage reduced by +2%
- 4 Peice Bonus: When acting on an even turn, damage taken reduced by 11.52% (1 turn)
- Green Brocade Bag (I)
- Red Brocade Bag (II)
- Orange Brocade Bag (III)
- Blue Brocade Bag (IV)
- 2 Peice Bonus: Final Damage reduced by +2%
- 4 Peice Bonus: When inflicting debuffs, Bleed, or Backfire on an enemy, damage taken reduced by 10.8% (1 turn)
- AIM Diffusion Force Field Theory Book (I)
- Annotated Textbook (II)
- Super Hard Math Workbook (III)
- Best Selling Test Prep Book (IV)
- 2 Peice Bonus: Final Damage reduced by +2%
- 4 Peice Bonus: Shields can absorb additional damage equal to 6.12% ATK
- Rolling Pin (I)
- Cooking Apron (II)
- Baker's Hat (III)
- Bread Mold (IV)
- 2 Peice Bonus: Final Damage +2%
- 4 Peice Bonus: Damage of Bleed skills +9.72% ATK
- Small Duckling (I)
- Small Spaceship (II)
- Small Pink Fish (III)
- Small Dragon (IV)
- 2 Peice Bonus: Final Damage +2%
- 4 Peice Bonus: Damage of Bleed Skills +9.72% ATK
- Spiked Bat (I)
- Joke Headband (II)
- Yoroshiku Windbreaker (III)
- Fashoinable Crew Cut (IV)
- 2 Peice Bonus: Final Damage +3%
- 4 Peice Bonus: Skills that cost >= 4 SP deal +14% damage
- Gekota Badge (I)
- Gekota Necklace (II)
- Gekota Gloves (III)
- Gekota Toy (IV)
- 2 Peice Bonus: Final Damage +3%
- 4 Peice Bonus: Damage of Bleed skills +13.5% ATK
- Kiririn Sunglasses (I)
- Kiririn Hat (II)
- Kiririn Mask (III)
- Kiririn Wing (IV)
- 2 Peice Bonus: Final Damage +3%
- 4 Peice Bonus: Skills that cost <= 3 SP deal +11% damage
- XBW (I)
- GGA (II)
- GGL (III)
- GGS (IV)
- 2 Peice Bonus: Final Damage reduced by +3%
- 4 Peice Bonus: When acting on an odd turn, damage taken reduced by 16% (1 turn)
- Go Piece (I)
- Shougi Piece (II)
- Game Board (III)
- Chess Piece (IV)
- 2 Peice Bonus: Final Damage Taken reduces by +3%
- 4 Peice Bonus: After inflicting removable Bleed, Backfire, or Debuffs, damage taken is reduced by 15%.
- Marshal Cape (I)
- Demon Lord's Steed (II)
- Demon Lord's Helm (III)
- Demon Lord's Blade (IV)
- 2 Peice Bonus: Final Damage reduced by +3%
- 4 Peice Bonus: Shields can absorb additional damage equal to 8.5% ATK
- Money Can't Change Fate (I)
- Saku-chan's Scream (II)
- Vitruvian Man (III)
- Fate Can't Change Life (IV)
- 2 Peice Bonus: Final Damage received reduced by +3%
- 4 Peice Bonus: When acting on an even turn, damage taken reduced by 16% (1 turn)
- Telescope (I)
- Star Map (II)
- Astronaut Model (III)
- UFO Model (IV)
- 2 Peice Bonus: Final Damage received reduced by +3%
- 4 Peice Bonus: Healing increased by +6%
- Shizu-chan's Weapon - I (I)
- Shizu-chan's Weapon - II (II)
- Shizu-chan's Weapon - III (III)
- Shizu-chan's Weapon - IV (IV)
- 2 Peice Bonus: Final Damage received reduced by +3%
- 4 Peice Bonus: Wound effects increase by 30%
- Matthew's Gold Bag (I)
- Cross (II)
- Wooden Wheel (III)
- White Feather (IV)
- 2 Peice Bonus: Final Damage +3%
- 4 Peice Bonus: After acting for 2 consecutive turns, gain Damage Up (16%, 1 turn)
- Furikazan Pauldrons (I)
- Furikazan Chestplate (II)
- Furikazan Waistguard (III)
- Furikazan Leggings (IV)
- 2 Peice Bonus: Final Damage received reduced by +3%
- 4 Peice Bonus: After acting for 2 consecutive turns, damage taken reduced by 18% (1 turn)
- Hanafuda (I)
- Ema (II)
- Japanese Snail (III)
- Gohei (IV)
- 2 Peice Bonus: Final Damage +3%
- 4 Peice Bonus: After casting a Climax Skill, gain the buff "damage increases by 19% when enemy HP <30%" (3 turns).
- Penicl and Eraser (I)
- A4 Sketchbook (II)
- Watercolors (III)
- Palette (IV)
- 2 Peice Bonus: Final Damage +3%
- 4 Peice Bonus: Damage of Bleed skills +13.5% ATK
- Bodyboard (I)
- Swimsuit (II)
- Swimming Goggles (III)
- Swimming Cap (IV)
- 2 Peice Bonus: Final Damage +3%
- 4 Peice Bonus: Damage +16% while SP >= 5 (does not apply to Cross Skills)
- Silver Horn (I)
- Third Eye (II)
- Hooded Cloak (III)
- Mobile Suit (IV)
- 2 Peice Bonus: Final Damage +3%
- 4 Peice Bonus: If Tatsuya has Fight Analysis, Crit Rate for Tatsuya is increased by 11% for 1 turn.
- Butterfly Hairpin (I)
- Vow with Butterfly (II)
- Purple Roses (III)
- Butterfly High Heeled Shoes (IV)
- 2 Peice Bonus: Final Damage +3%
- 4 Peice Bonus: If a target gets hit with a 6 point Climax skill, It will take an additional 42% more damage for 1 turn. [Can be Purified]
- Maple Bag (I)
- Goldfish Bag (II)
- Red Lotus' Vibrating Sleeves (III)
- Japanese Flip-Flops (IV)
- 2 Peice Bonus: Final Damage +3%
- 4 Peice Bonus: In the duration of the buff provided by Shana's talent - Blazing Wings, Kimono Shana teams casts any skills to trigger the [True Crimson] effect to resolve once on the enemies, immediately dealing DMG equal to 300% [True Crimson] DMG shown multiplied by the number of turns remaining of [True Crimson]. The hit can't be critical and isn't affected by other effects.
(Source: Crossing Void Global Wiki - Expanded)
Game Modes[]
Story[]
The Main campaign of Dengeki Bunko: Crossing Void is an original storyline featuring the various playable characters in the game. It consists of 15 chapters. Within each chapter, there are Story Sequences, Minor Missions, Major Missions, Boss Missions, Training Missions and Fragment Quests. Major missions, Boss missions, and fragment quests all have star conditions.
List of Chapters:
Chapter 1: Poor Vending Machine
Chapter 2: Rogue Robots
Chapter 3: Modified Program
Chapter 4: Black Warrior
Chapter 5: Radar Breaker
Chapter 6: Strange Attacker
Chapter 7: Flame Haze's Discovery
Chapter 8: A Sudden Stir in the Pool
Chapter 9: PVP Battle
Chapter 10: Gathering Storm
Chapter 11: Into the Chaos
Chapter 12: Mysterious Guide
Chapter 13: Source of Chaos
Chapter 14: Key Persons
Chapter 15: Draw to an End
Golden Storm[]
Golden Storm requires 1 Golden Storm Ticket to enter. The Golden Storm Tickets are replenished at 12:00UTC daily.
The mode requires you to defeat 3 CMR-91 (Main) within 5 rounds. A base reward is awarded upon survival of all 5 rounds and an additional rewards are awarded for each CMR-91 defeated.
The rewards and HP of the CMR-91 increase as the user's Void Agent Level increases.
Psyche Zone[]
Psyche Zone is a floor-type challenge mode with six stages. Each of the stages contains sub-stages within in that must all be cleared before you can advance to the next stage. Stage advancements and demotions are carried out at the end of the 3-day Psyche Zone Season.
Each stage contains passive undefeatble enemy. To complete the stage, you must deal a certain amount of damage, which differs between stages and sub-stages. Each sub-stage can only be challenged once per season.
Void Expedition[]
Void Expedition is a gauntlet-style challenge where you face 8 consecutive matches with a limited number of characters and do not heal between battles. Void Expeditions award Expedition Coins. You need a Void Expedition Ticket for each run; you receive 2 every Monday and Thursday at 1200 UTC. You cannot have more than 2 tickets at a time, so you should make sure to do 4 expeditions each week.
There are 8 difficulties; starting with 1, complete a difficulty to unlock the next higher difficulty. Once you choose your difficulty and characters, your expedition is locked until it is complete or you give up. This includes character levels, skill levels, equipment, and impression weapons.
After completing a floor, you gain a buff that applies for the remainder of the expedition. In other words, for the 8th and final battle, you will have the benefit of 7 different buffs.
After completing the 3rd and 6th battles, you are given the option to either resurrect one fallen character or heal all characters still alive.
(Source: Crossing Void (Global) Wiki)
Void Trail[]
Void Trial is a series of puzzle trials where you use a premade party to defeat another premade AI party. Each trial focuses on a single game mechanic or strategy type.
More trial sets are unlocked as you progress through the story. You must get at least 1 star in every trial in a set in order to access the next set.
The Pinnacle[]
The Pinnacle is a tower-type challenge of increasing difficulty. There are four stages, named Phases which all have fifteen floors. Every 5 floors will give you a reward upon completing it.
Each floor has a set of specific set of conditions which will grant a 10-25% Final Damage Bonus once met.
Each floor can only be completed once.
Pandemonium[]
Pandemonium is a 3 floor dungeon challenge. In this mode, 1 Pandemonium Exploration Ticket will give you an attempt at the dungeon challenge. Within the challenge, you traverse each floor finding the stairs to progress to the next floor.
Each Floor contains: a vending machine, which allows you to purchase items with Chaos Crystal Coins; a bonfire that allows you to heal party members, restore skill usage or earn Chaos Crystal Coins; A random encounter, with varying success based on trait levels; and enemy encounters.
During Each attempt at a pandemonium stage, each character used only has one life. They cannot be revived.
Breaking Event[]
Breaking Events are randomly triggered quests that are shared with Friends and Fellow Guild Members. They can be triggered be completing a quest that requires energy or Uncharted Void.
There are three types of breaking events: Character EXP Up, in which you are awarded items that can be used to level up characters; Raining Money, in which you are awarded coins; and Impression Weapon Enhance Up, in which you are awarded Impression Dust and Impression Materials needed to upgrade impression weapons.
3 Breaking Events can be completed a day
(source: Crossing Void Global Wiki - Edited)
Uncharted Void[]
Uncharted Void is a team raid-style challenge that unlocks at level 30.
You queue to create or join a room with up to 2 other players, each player chooses a Main and Support pair from their list of characters, and you battle together as a single party with each player controlling their own team. While Speed still dictates when each player gets to act, SP and CP are not shared, so everyone has to manage their own resources. Every player gains 4 SP at the start of each turn.
(Source: Crossing Void Global Wiki)
Burst Link[]
Burst Link is a draft-style player-versus-player mode. Instead of using your own characters, equipment, and Impression Weapons, you create a party of stock characters normalized at approximately the same level of strength and battle other players.
When you start a Burst Link session, you are given a choice of 3 random Main Characters. After choosing one, you then choose from 3 semi-random Support Characters. At least 2 of them will be characters that have a Cross Skill with the Main Character you chose immediately prior. You do this 4 more times to come up with a party of 3 Main Characters and 3 Support Characters. You can rearrange the positions of the teams, as well as swap around Support Characters, if you wish.
After drafting your party, you can search for opponents who also have a full Burst Link party ready to go. The remainder of your Burst Link session will consist of battling other players until you either achieve 5 victories or 3 losses. Once your session is over, you earn rewards based on how many victories you got.
You need a Burst Link Ticket in order to start a Burst Link session. You receive 2 tickets each week on Monday at 1200 UTC and can save up to 10 at a time. Burst Link is also only available for 2 hours at a time, 3 times a day, between 0300-0500, 1100-1300, and 1900-2100, all times UTC.
(source: Crossing Void Global Wiki)
Mirage[]
Mirage is a pseudo-PVP mode where you fight against the AI-controlled parties of other players.
Every day you will have three mirage sessions. These sessions do not carry over to the following day. Each session will find 3 other players - one who is ranked lower than you, one about the same as you, and one higher than you. All opponents will be about the same Void Agent Level as you. Choose one of the 3 opponents to fight. If you win consecutive battles, the victory points from each battle are added together, up to 5 wins in a row.
You earn bonus points if one of the weekly characters are in your party. The 3 characters are chosen randomly each week. There is only a single bonus granted per battle - having all 3 characters gives you the same bonus as having only 1 character.
Your goal is to get the highest score you can each week. This score determines if your tier will go down, remain the same, or go up. The first time you reach a new tier, you'll earn 1 Gacha Voucher. You also get an icon frame that's usable for 7 days based on your tier.
There are also weekly rewards for your first 5 wins, regardless of whether they're consecutive or not.
(source: Crossing Void Global Wiki - Edited)
Decrepit Dream[]
Decrepit Dream is a leaderboard-style competition challenge. Players are randomly placed into squads of 20 judged to be similar in skill level and attempt to deal the most damage to passive, unkillable enemies.
Each Decrepit Dream season is split into 8 minor cycles. There are 2 cycles each week, the first taking place between Monday 1200 UTC and Thursday 0600 UTC against a single enemy, and the second taking place between Thursday 1200 UTC and Sunday 0600 UTC against 3 enemies. Players are given 6 Decrepit Dream Tickets each cycle; any unused tickets at the end of a cycle are lost.
1 damage point is earned for every 100 damage dealt. Victory points are earned at the end of the cycle based on your final placement within your assigned squad. Rewards are earned based on your score each cycle, at the end of each cycle based the tier achieved from your victory points, and at the end of the season based on your final tier after 8 cycles.
(source: Crossing Void Global Wiki - Edited)
Treasure Hunt[]
Treasure Hunt is a dungeon exclusively for farming equipment and potions. It first becomes available at level 10, and as you continue to level up, harder difficulties unlock with better drops.
There are 3 Treasure Hunt stages, with each one being available for 2 days out of the week, and all 3 available on Sundays. Shinto Secret and Ghost Story are just normal battles, but Ikebukuro Legend is kind of a trick level where you only need to defeat a single enemy, but attacking the helper robots actually makes the quest nigh impossible to clear when you're at-level.
(source: Crossing Void Global Wiki)
Guild Dungeon[]
The Guild Dungeon is a cooperative guild event that occurs every week from Friday 1200 UTC to Monday 1200 UTC. Work together with your whole guild to clear all subdungeons to unlock the guild dungeon boss. Then, aim to get the highest score you can on the guild dungeon boss to unlock rewards for every member of the guild.
Each character can only be used once a day.
(Source: Crossing Void Global Wiki - Expanded)
Events[]
External Links[]
- Dengeki Bunko: Crossing Void Wiki
- Most of the information on this page comes from the Crossing Void Global Wiki.
- Crossing Void - Global, YouTube Channel
Gallery |
|---|
|
Crossing Void - Global 「Lost In Eyes」 Dengeki Bunko: Crossing Void Global Opening Theme: "Lost In Eyes"
Characters[] |


![Crossing Void - Global 「Fall in love」 (45 KB) Dengeki Bunko: Crossing Void Global - "Fall in Love" [Hatsune Miku]](https://static.wikia.nocookie.net/dengeki/images/9/9c/Crossing_Void_-_Global_%E3%80%8CFall_in_love%E3%80%8D/revision/latest/scale-to-width-down/185?cb=20210406175708)


